1. Download the latest version of VMLogin then create an account (3-day Free Trial).
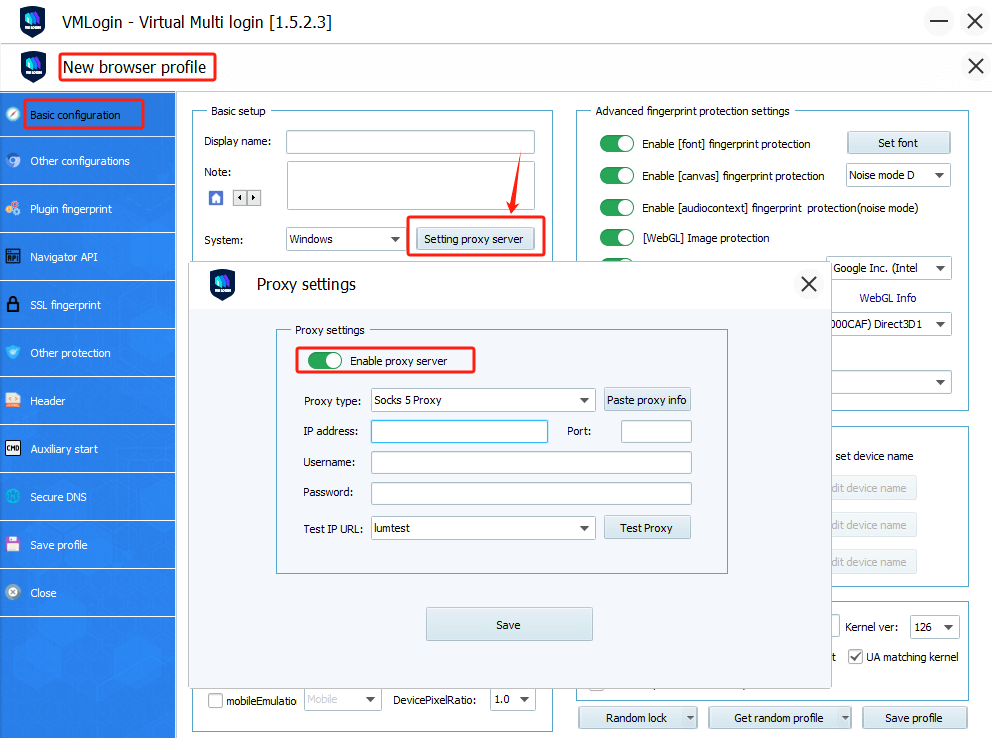
2. Click "New browser profile" -> Setting proxy server -> Enable proxy server -> Select "Socks5 Proxy".
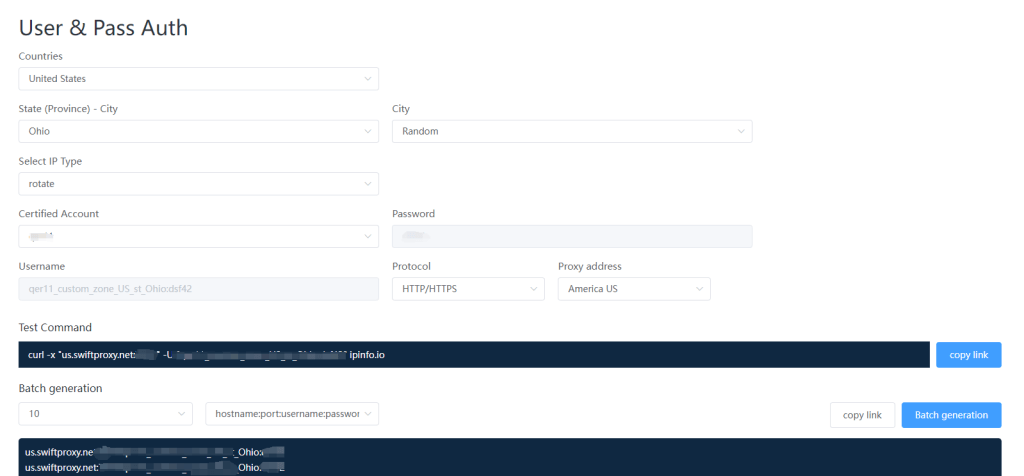
3. Visit the Swiftproxy dashboard and configure your proxies. We are using IPs from Ohio/The United States with IP rotation on each request using SOCKS5 protocol in this case. Copy the proxy information after setting up the residential proxy.
4. After entering the proxy details provided by Swiftproxy, users can simply click "Paste proxy information" to automatically populate the proxy data. There are two formats for "Paste proxy information":
① The first one is: IP address:Port:User:Password
② The second one is : User:Password@IP Address:Port
[Users get to copy proxy information in correct format via Swiftproxy account dashboard]
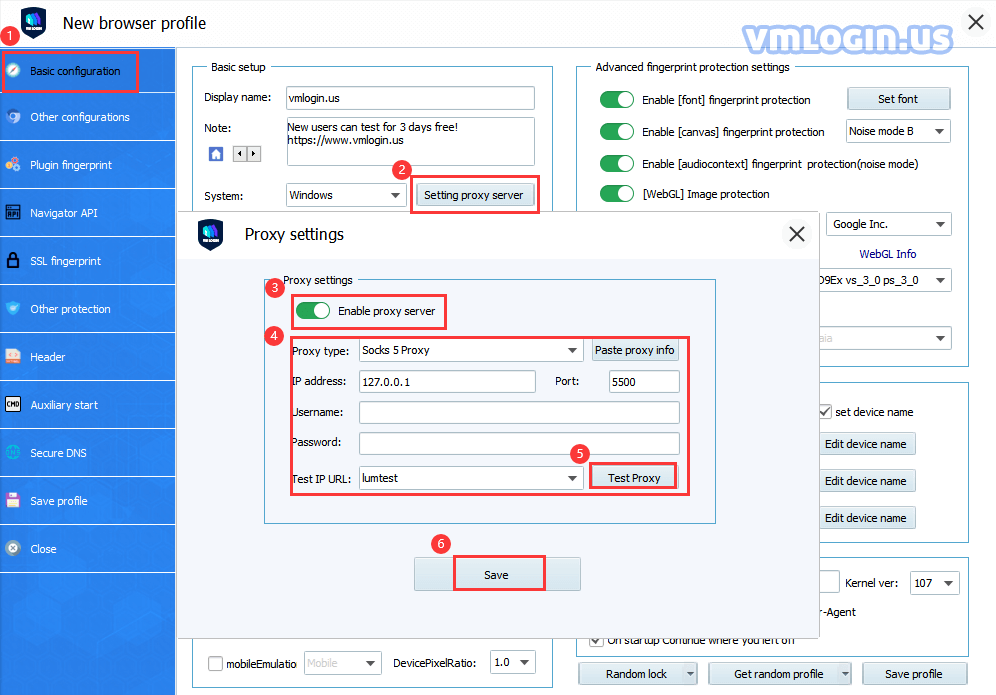
5. Save the profile and launch the browser.
Note: VMLogin browser has no proxy IP service, users need to purchase proxy IP from a third party. Proxy-related tutorials are provided by third-party platforms and unrelated to the VMLogin. Users are strictly prohibited from using VMLogin to engage in any illegal and criminal activities, and users are responsible for the relevant responsibilities caused by using VMLogin.