1. Download and install VMLogin client (newly registered users can get 3 days free trial).
2. Open and log in SOAX website.
3. Open multiple browser profiles with different IPs and Ports.
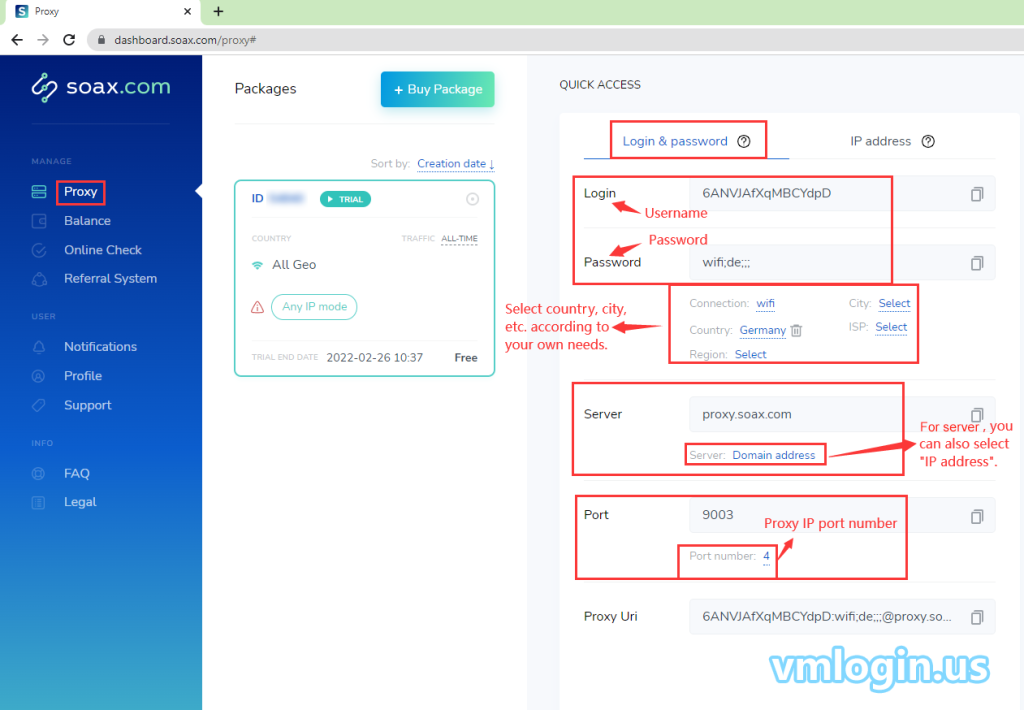
A、By using “Login & password” method to set multiple ports.
QUICK ACCESS -> Login & password
(1)Login -> Password -> Server -> Enter the number of ports -> Save
Note:
a、Login: Login is the username in the SOAX system, it’s the package name.
b、Password: Password indicates the proxy’s geo parameters, such as connection type, country, region, city, and provider. These parameters are separated with “;”. However, you can choose to separate them with “_” after your proxy list has been exported.
c、Server: Select "Domain address" or "IP address" according to your own needs, it is recommended to select "Domain address";
d、Port: 9000, 9001, ..., the number of ports depends on the number of ports available for your package, and the number of ports is set according to your needs. If set 10 for the port number, it will allocate 10 IPs to these ports at the same time.
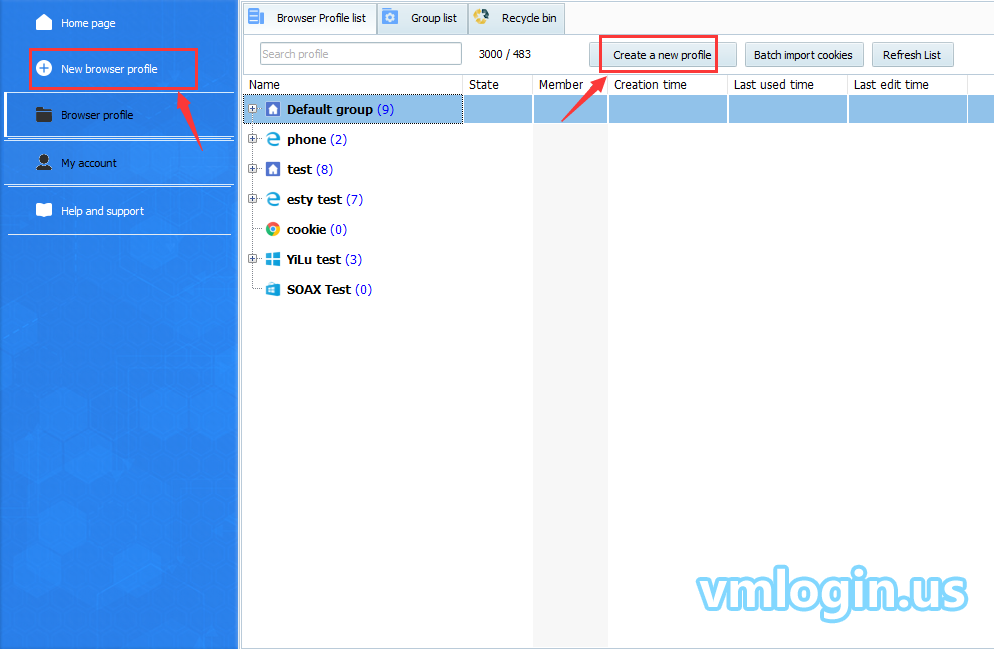
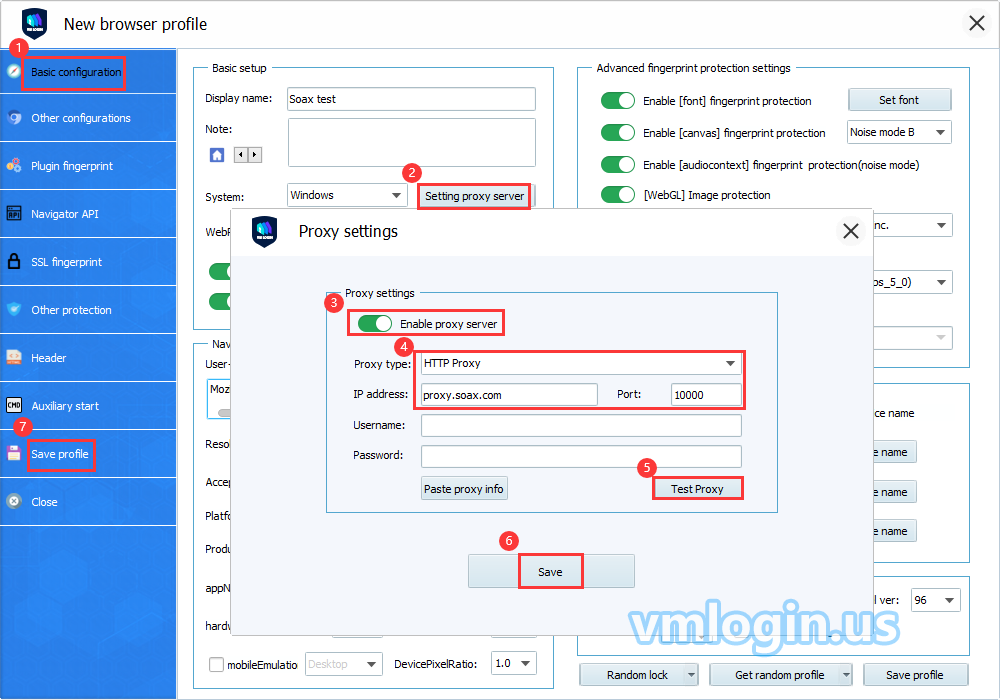
(2) Open VMLogin client, click "New browser profile" or "Create a new profile" to create a new browser profile.
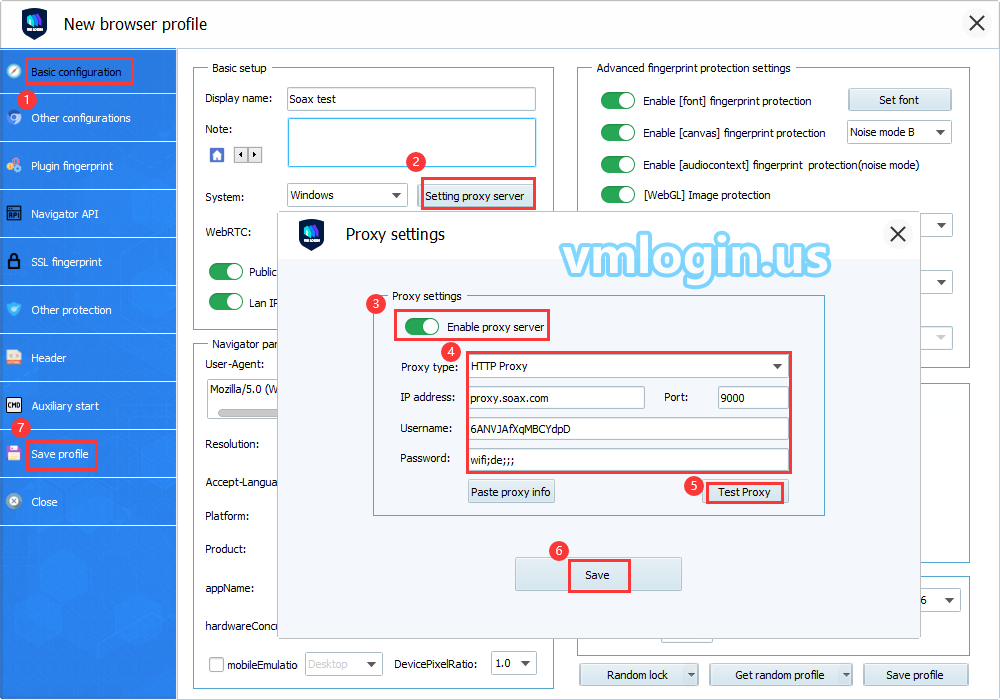
(3) Basic configuration -> Setting proxy server -> Enable proxy server, enter the following information:
Proxy type: HTTP Proxy (You can also choose SOCKS 5 as the proxy type)
IP address: proxy.soax.com (You can also choose IP address)
Port: 9000 (If set multiple ports, fill in ports such as 9001, 9002, etc. in other profiles)
Username: Login
Password: Password
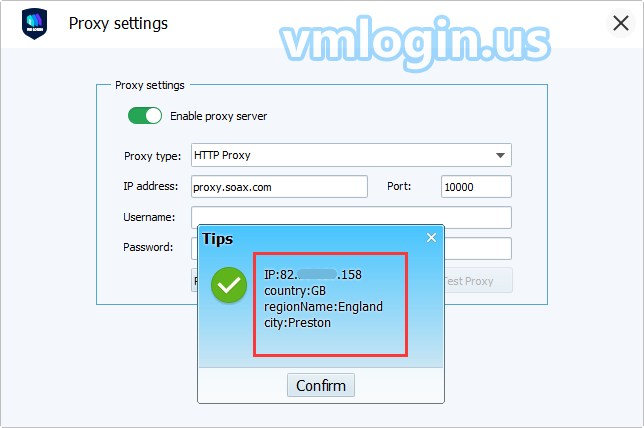
Click "TestProxy" button to test the proxy and save the settings.

B、By using the “IP address” method to set multiple ports.
QUICK ACCESS -> IP address
(1) Add your IP address to the whitelist. IP whitelist -> Check your IP -> Input IP address -> Save
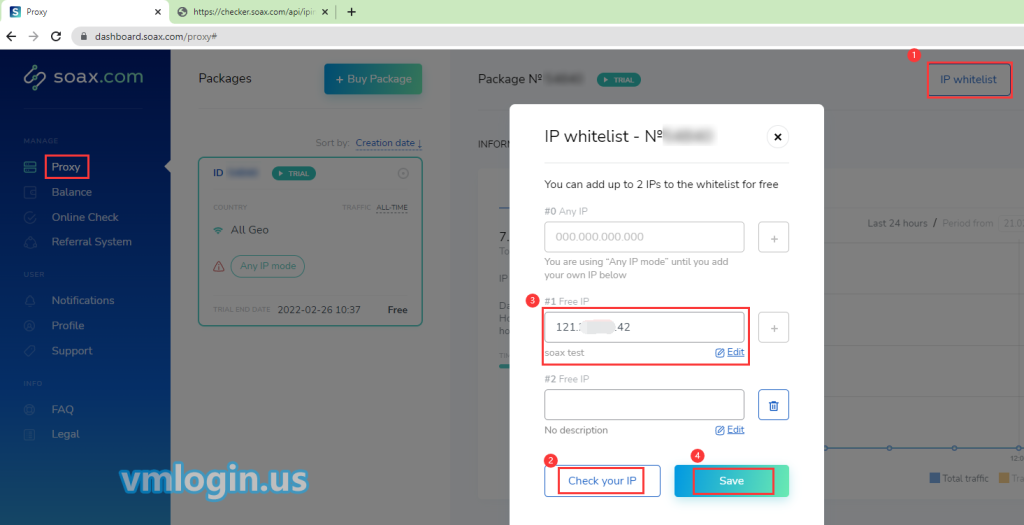
(2) Add Filter -> Select country, region, etc. -> Enter the number of ports -> Save
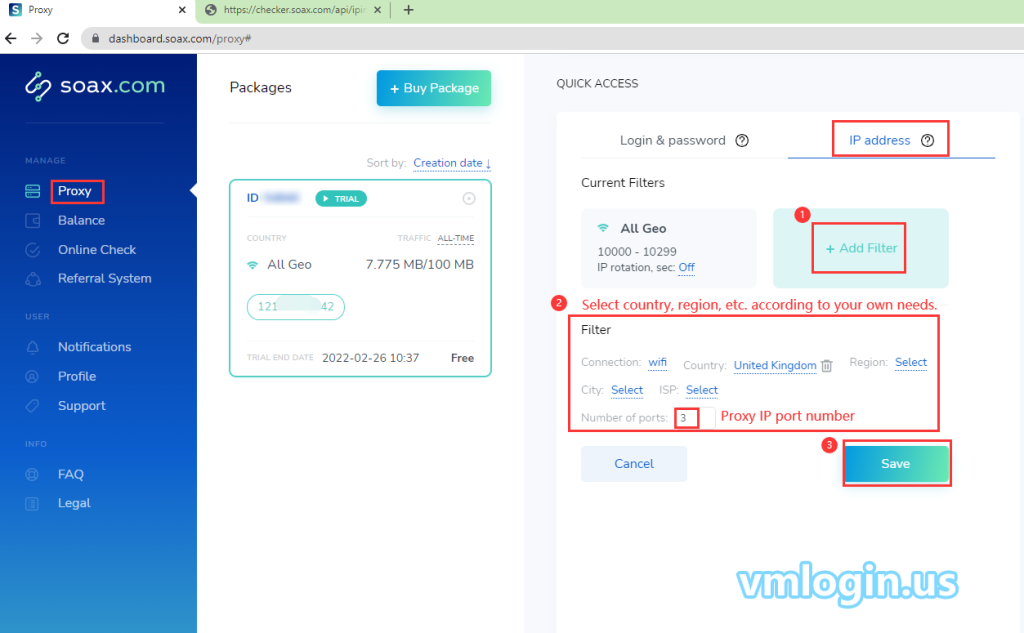
Note:
The ports are 10000, 10001, ..., the number of ports depends on the number of ports available in the user’s package, set the number of ports according to your needs. For example, if set 10 for the port number, it will allocate 10 IPs to these ports at the same time.
(3) Open VMLogin client, click "New browser profile" or "Create a new profile" to create a new browser profile.

(4) Basic configuration --> Setting proxy server --> Enable proxy server, enter the following information
Proxy type: HTTP Proxy (You can also choose SOCKS 5 as the proxy type)
IP address: proxy.soax.com (You can also choose "IP address")
10000 (If set multiple ports, fill in ports such as 10001, 10002, etc. In other profiles)
Username: leave it blank
Password: leave it blank
Click "TestProxy" button to test the proxy and save the settings.
SOAX Proxy Settings Video Tutorial.
VMLogin browser software itself has no proxy IP service, users need to purchase proxy IP from a third party. Proxy-related tutorials are provided by third-party platforms and are not related to the VMLogin. Users are strictly prohibited from using VMLogin to engage in any illegal and criminal activities, and users are responsible for the relevant responsibilities caused by using VMLogin.