

How to integrate VMLogin with Luminati
1. Install and Launch Luminati Proxy Manager.
2. Then it will automatically open http://127.0.0.1:22999/ browser interface for management.
3. Create the proxy port
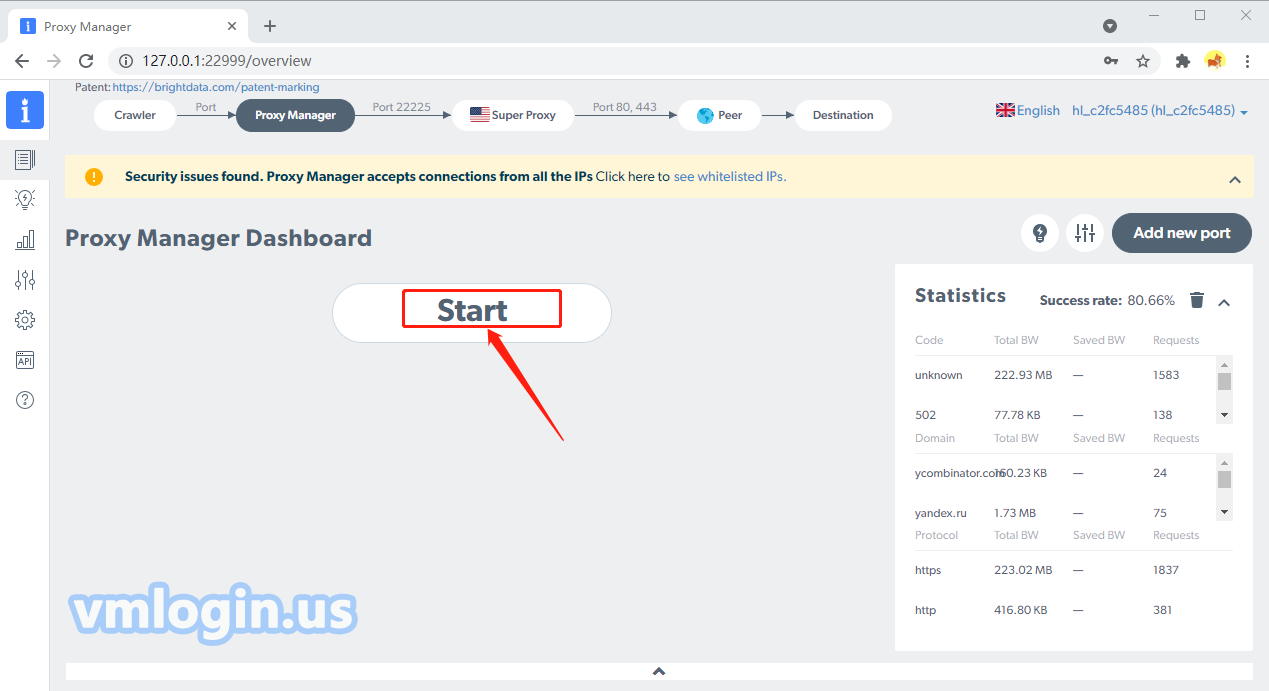
A. Login Lumitnati -> Start
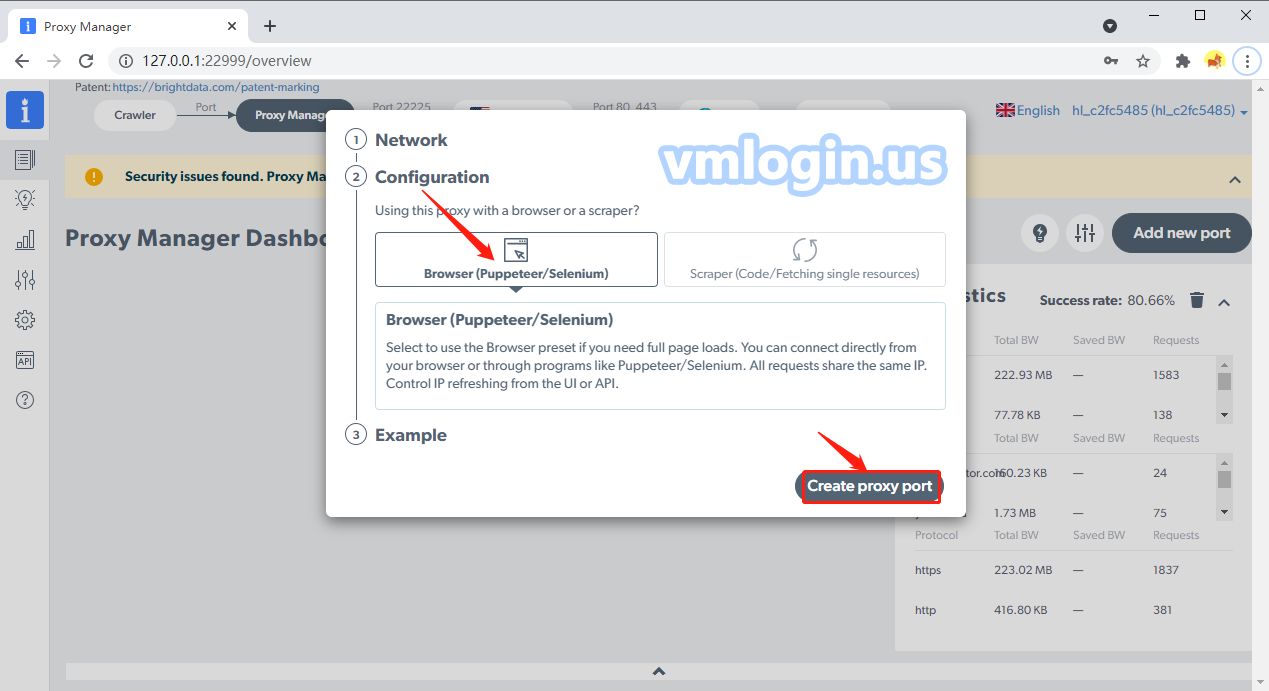
B. Network-> Lumitnati, choose Luminati or External which you want.
C. Configuration-> Browser (Puppeteer/Selenium)
D. Create proxy port, then close.


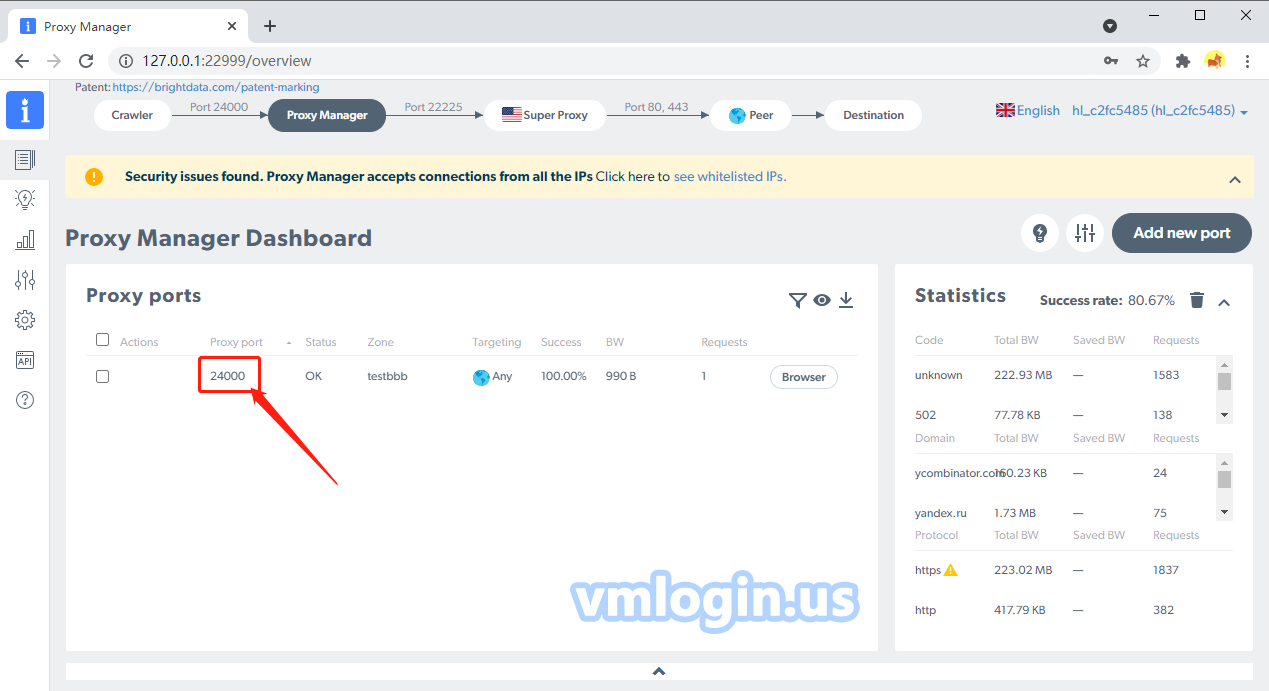
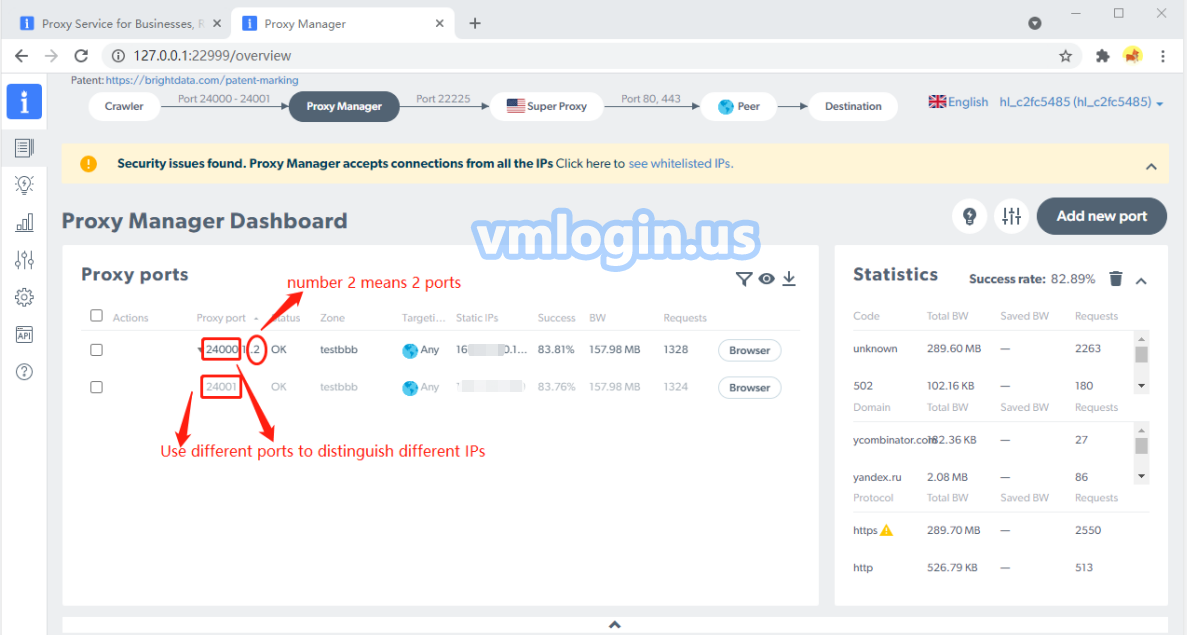
4. Open multiple ports, each port corresponds to a different IP address, click port 24000 on Proxy manager page.
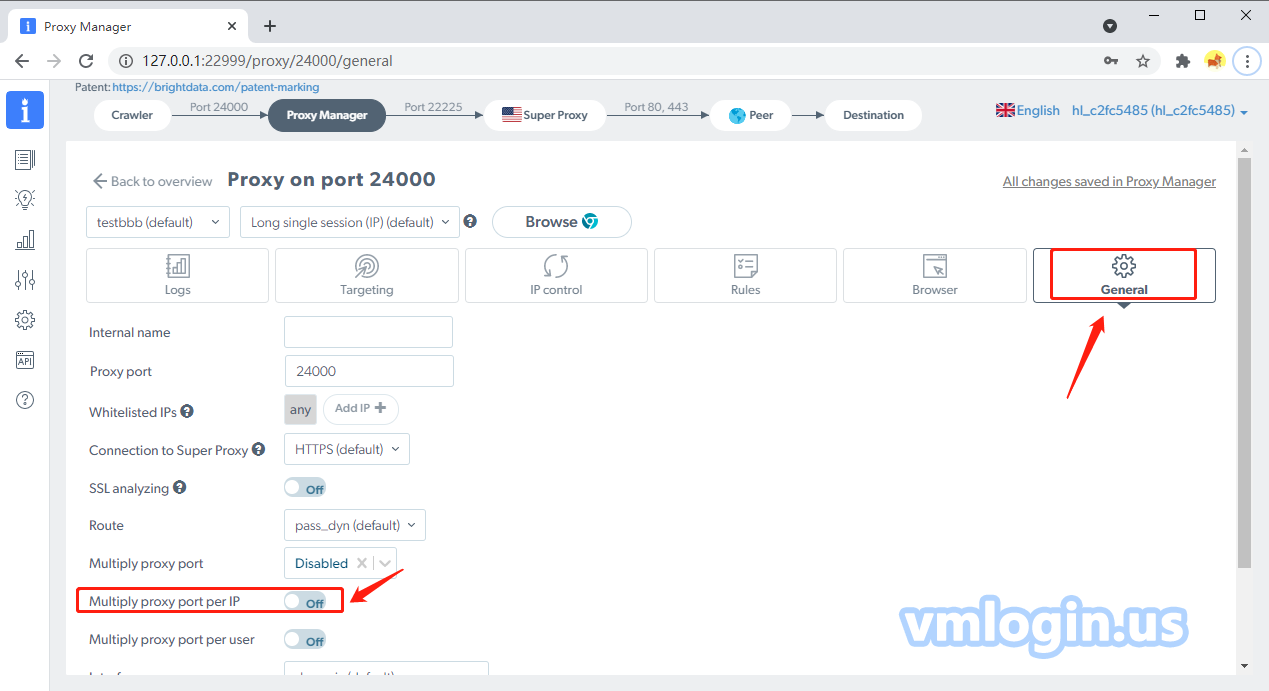
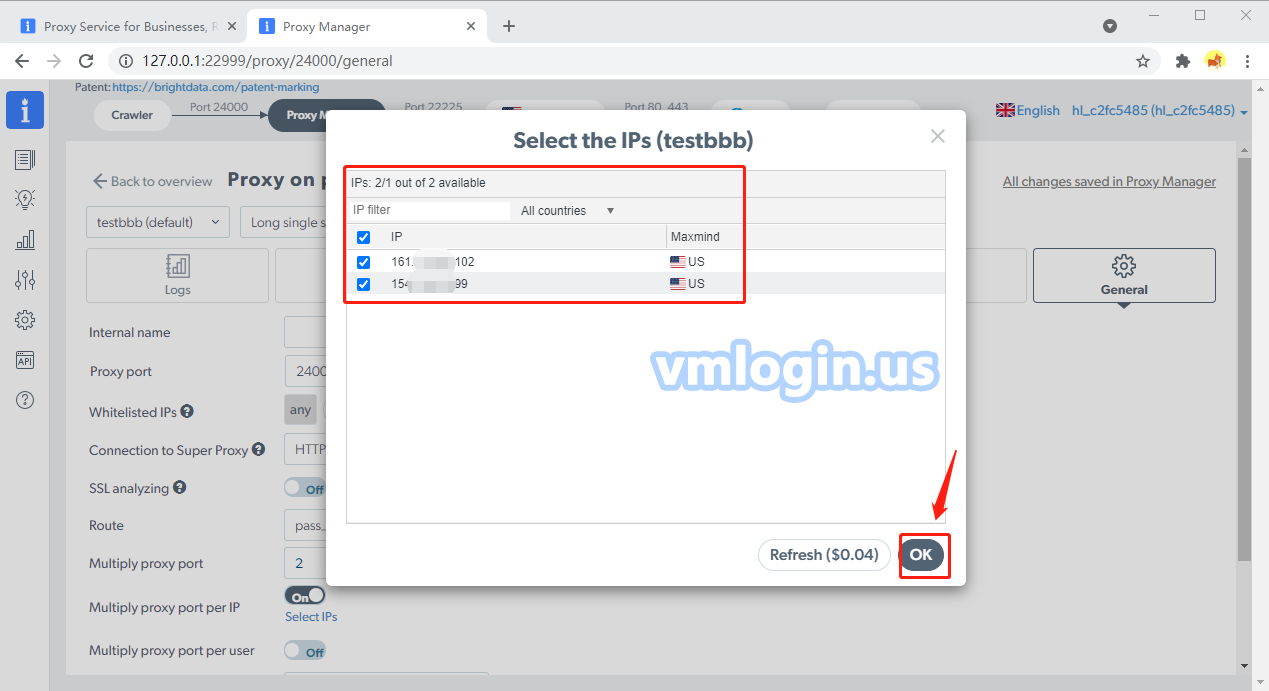
5. General->Multiply proxy port-> select the number of port(such as 2), turn on the button of "Multiply proxy port per IP", click "Select IPs", and select the IP for the current port to use.
6. Back to the overview page, you can see 2 different ports to distinguish two different IPs.
7. Download and install VMLogin.
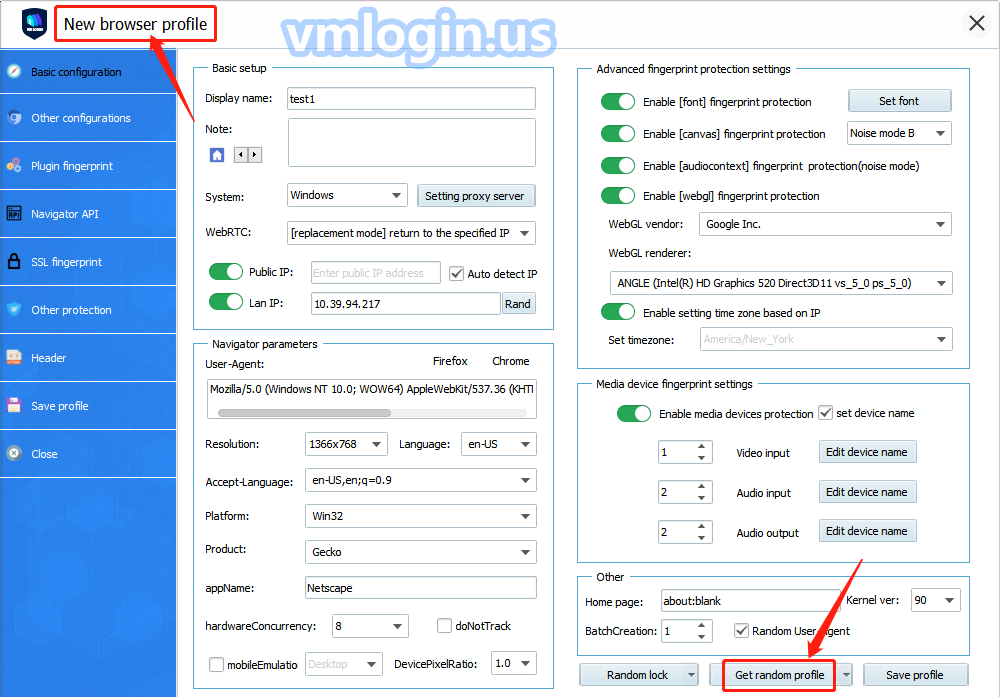
8. Open VMLogin, as shown below picture, create a new browser profile, click to “Get random profile”, you can also set up the profile according to your needs.
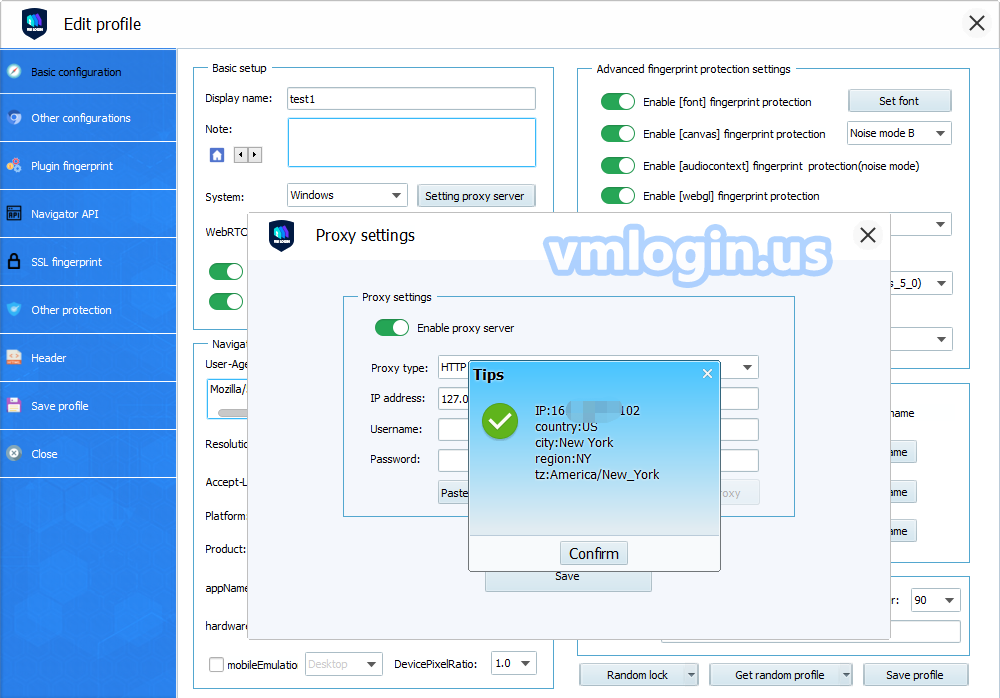
9. Set the proxy server, for example:
Proxy type: HTTP Proxy (You can also choose SOCKS 5, HTTPS as the proxy type)
IP address: 127.0.0.1
Port: 24000 (If set multiple ports, Luminati will distinguish them in order of 24001, 24002, 24003, etc.)
Click test proxy after setting, as shown below:

10. Use port 24001 for the second profile, the same IP address: 127.0.0.1, In this way, multi-port forwarding can be realized, and accounts can be logged in batches without being associated.
Note: If you want multiple people to use Luminati IP together, you need to install Luminati on the VPS. For the IP address, in VMLogin Profile’s settings, you need to fill in the VPS IP, the port should be filled in according to the Luminati port, and you need to add the local computer IP to whitelist or select any in the Luminati background. If the network is slow, unable to open the web page or unstable network, you can try to open VPN locally.
