1.Open the website of smartproxy.
2.Click the option of Authentication Method to create and check the proxy's username and password, the settings are same for Residential Proxies and Datacenter Proxies, As shown below:

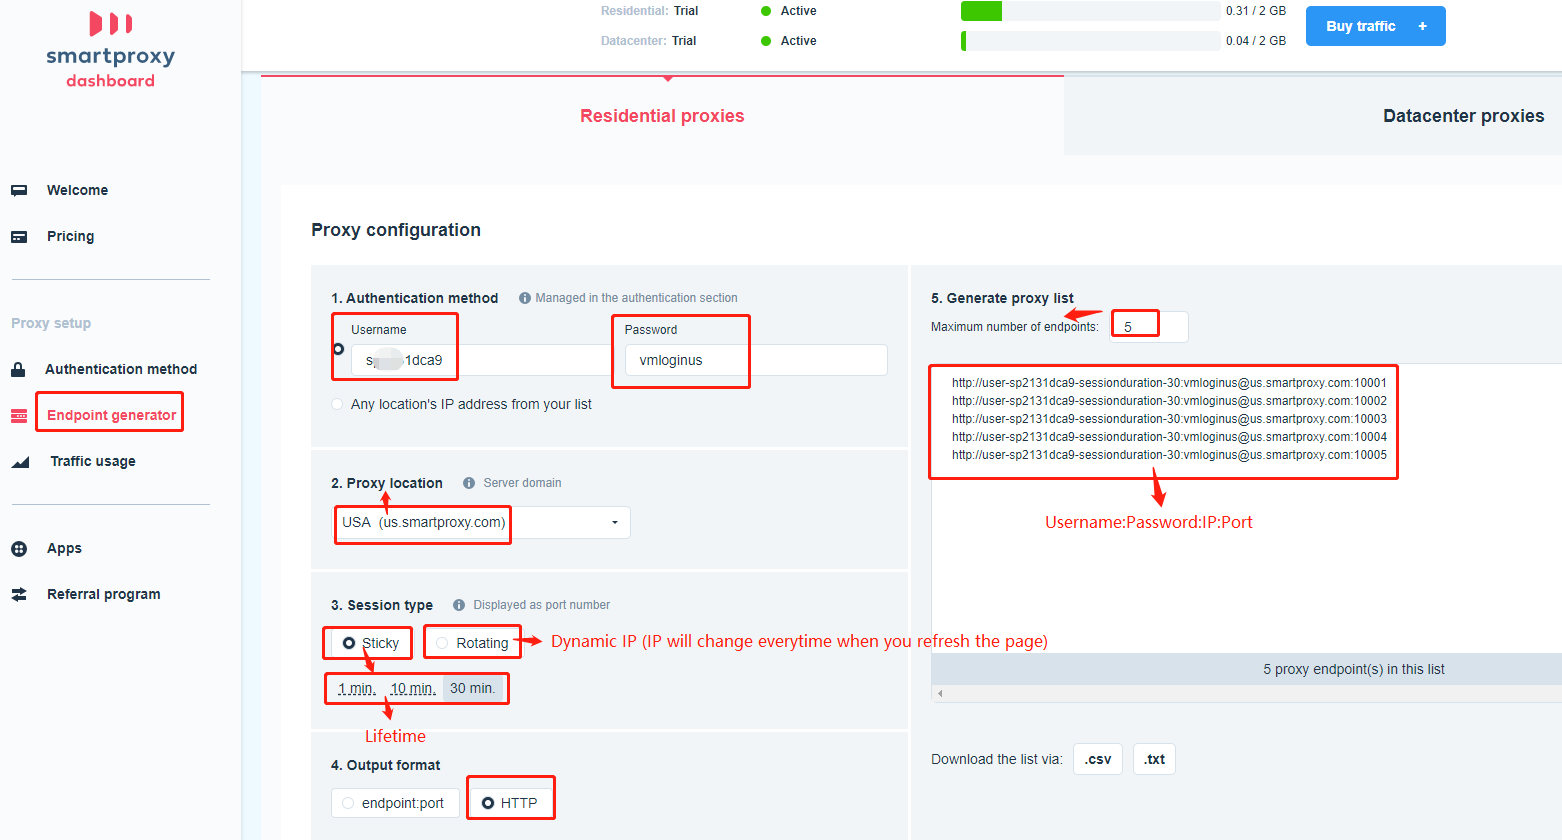
3.Click Endpoint Generator to create multiple ports and IPs. Input the username and password -> Choose the country -> Sticky or Rotating -> HTTP -> Input the number of endpoints -> Generate multiple ports and IPs. As shown below:
4.Open VMLogin profile -> click “Setting proxy server” -> HTTP -> Input IP address:Port:Username:Password -> Test Proxy -> Save
DataCenter's IP is gate.dc.smartproxy.com, Residential Proxies IP can be customized, you can select the country for your needs,Take the US as an example: us.smartproxy.com (us.visitxiangtan.com), ( If you test the proxy failed, please try to change the "smartproxy" to "visitxiangtan" in IP address), port 10001 ( check the port on the dashboard of Smartproxy), Input the account and password to successfully connection.
Note:the Username will change depending on the country, session type,IP duration, you can check it on the dashboard of Smartproxy. For example: we choose “Sticky”, “30min”, the username will be “user-sp2131dca9-sessionduration-30”, Rotating and Datacenter’s username are same as “gate.dc.smartproxy.com”. As shown below:

5.Click “TestProxy”, a tips shows the IP information, save the settings and then you can open the browser to test the HTTP proxy.
