What is ABM.NET?
It’s a Premium Static Residential proxy service. You can choose and set up proxies according to your needs. ABM.NET has a wide selection of countries, cities and ISPs. Super convenient types of authorization by whitelist or login/password. Safe browsing and protection from information leakage.
VMLogin+ABM=1000+ Accounts Login at the same time in one PC.
How to Integrate VMLogin with ABM.NET Proxies?
1.Download and install VMlogin. (new users can apply for 3-day free trial)
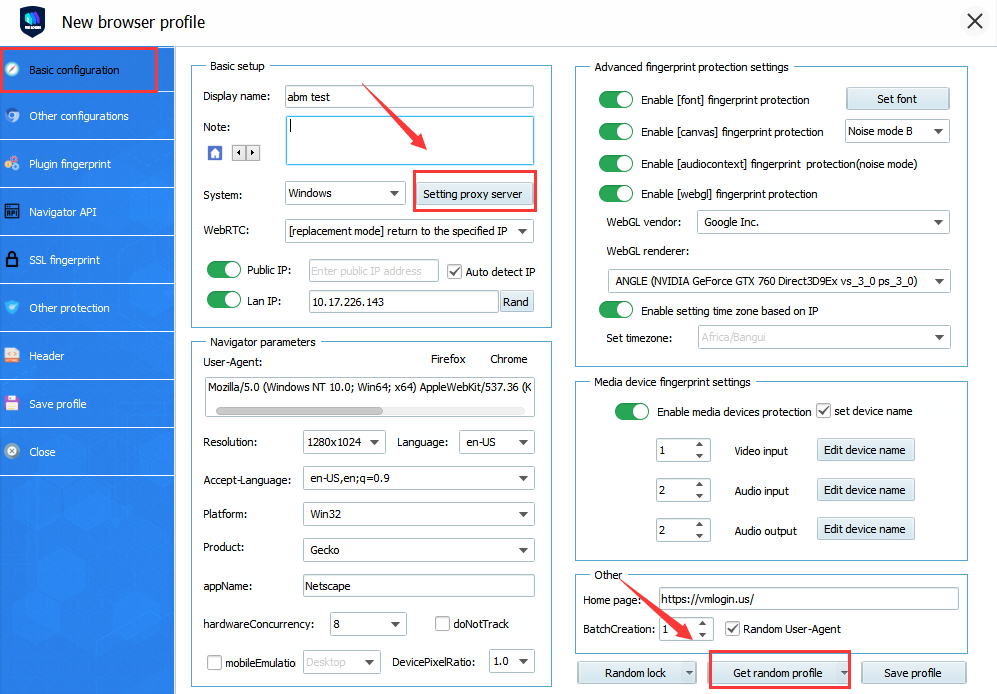
2.Open VMLogin, as shown below, to create a new browser profile, please click ”Get random profile” button to get a random browser profile, or you can also set it according to your own needs.
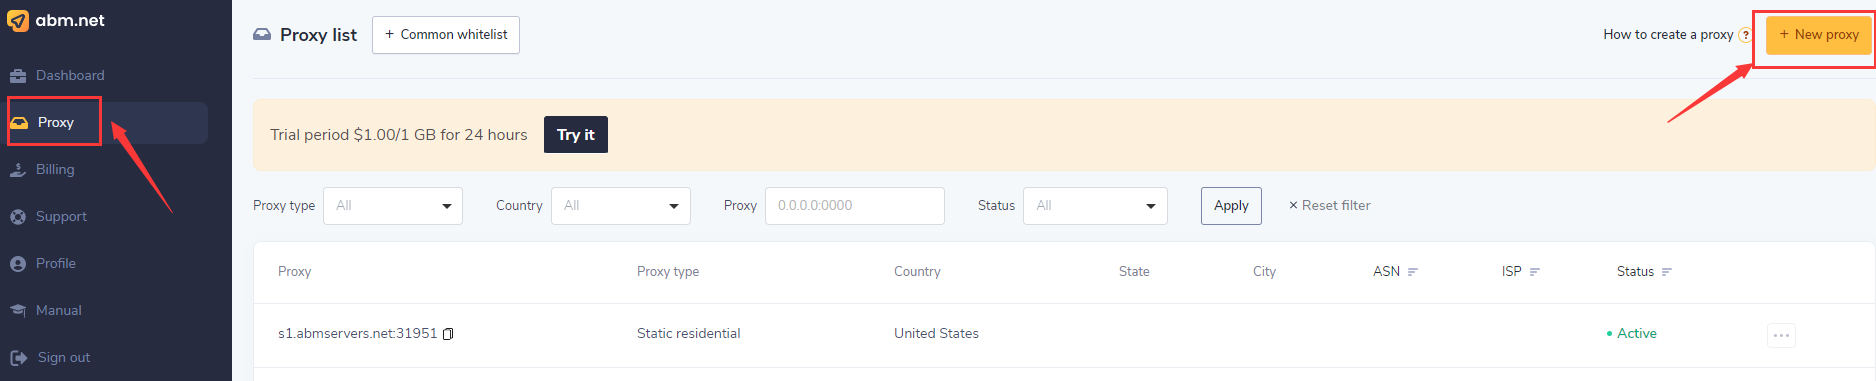
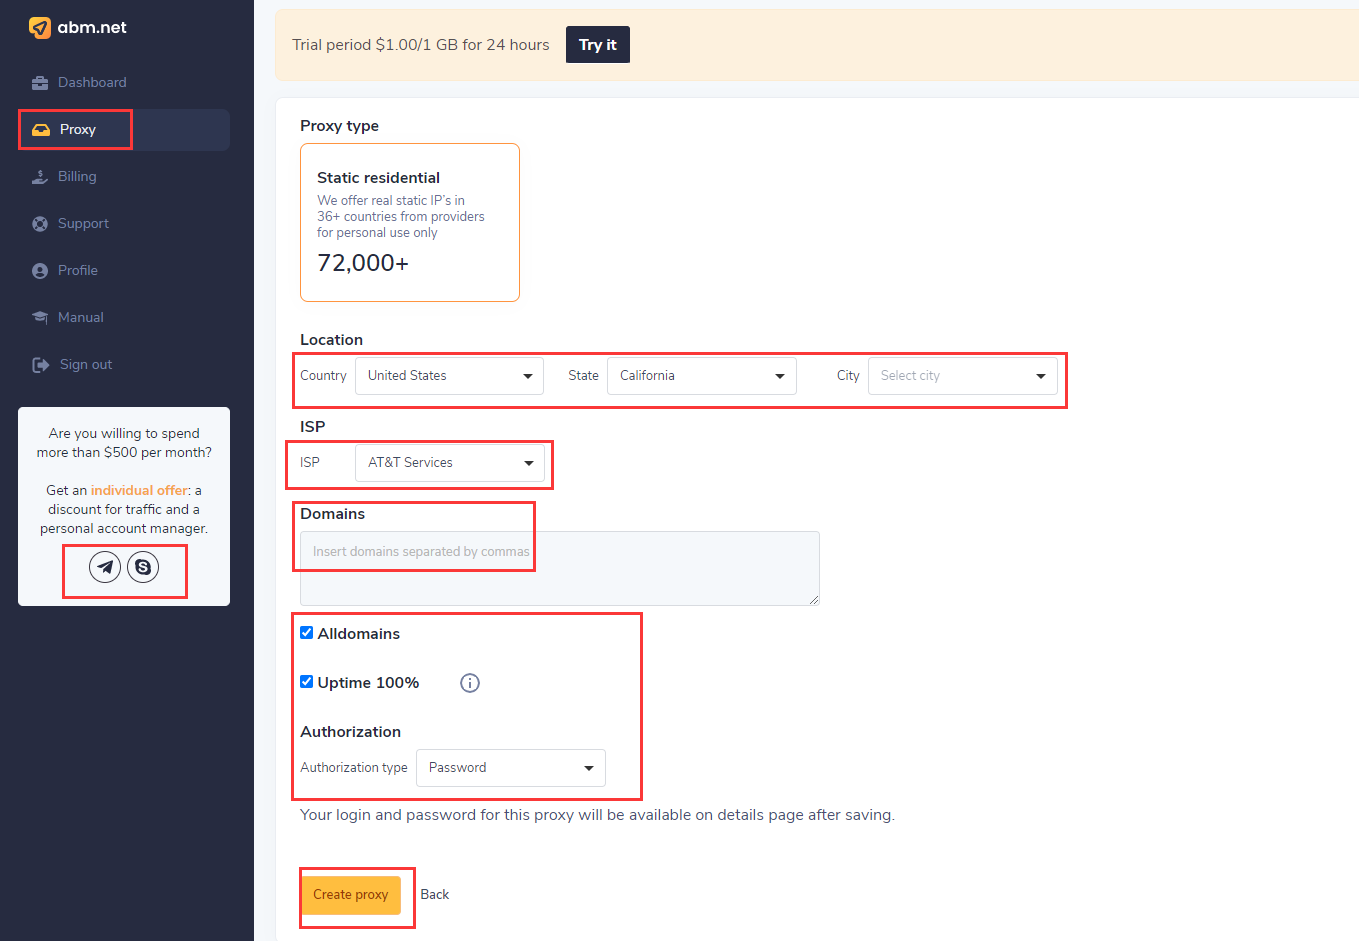
3.Open the Abm official website, log in the background, click “Proxy”, click “New Proxy”, then you can create an IP.
Benefits for VMLogin users: receive an $8 bonus by using the «vmlogin» promo code.To make it even more simple, use this link https://abm.net/promo/vmlogin to sign up and the promo code will be automatically included.
4. Create IP:
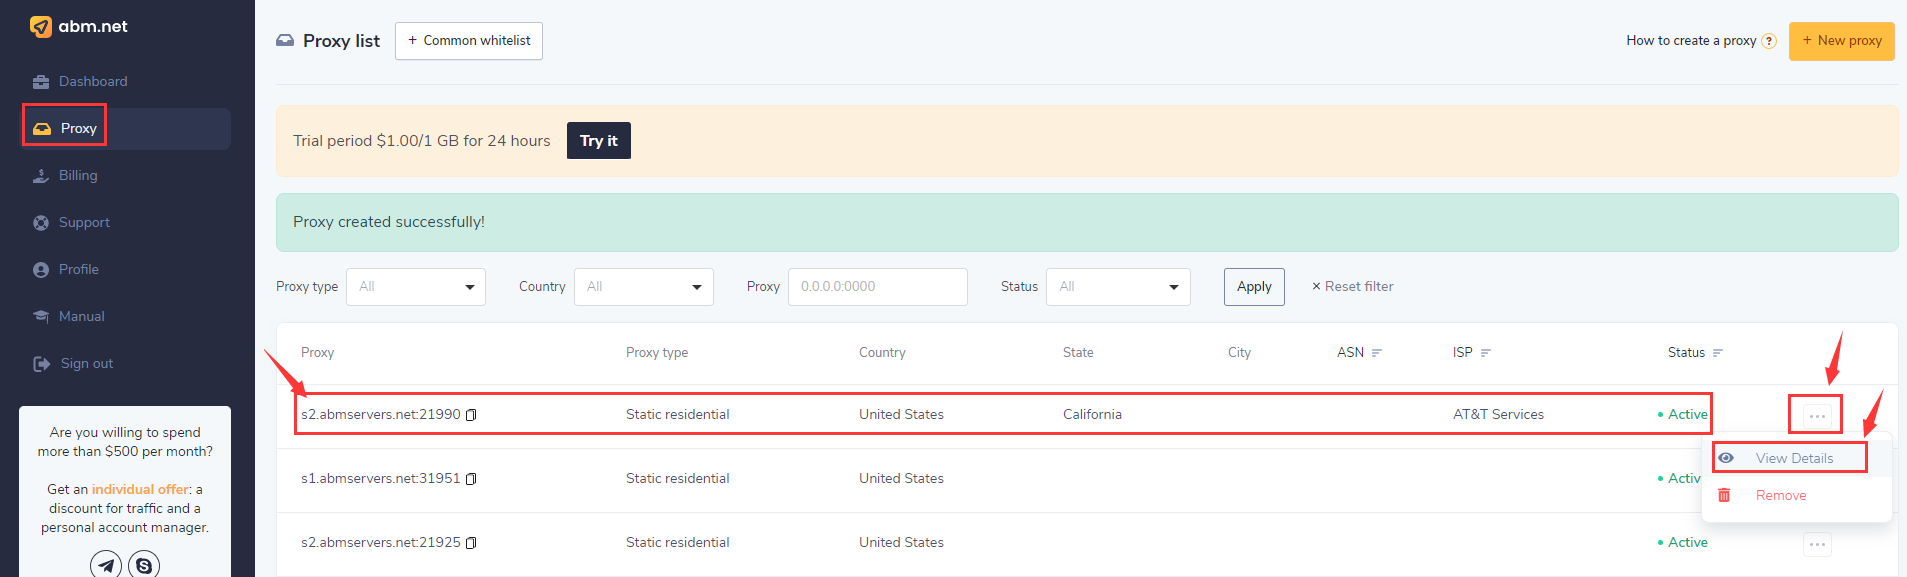
5.Click "View Details", you can check the IP:Port:Username:Password.
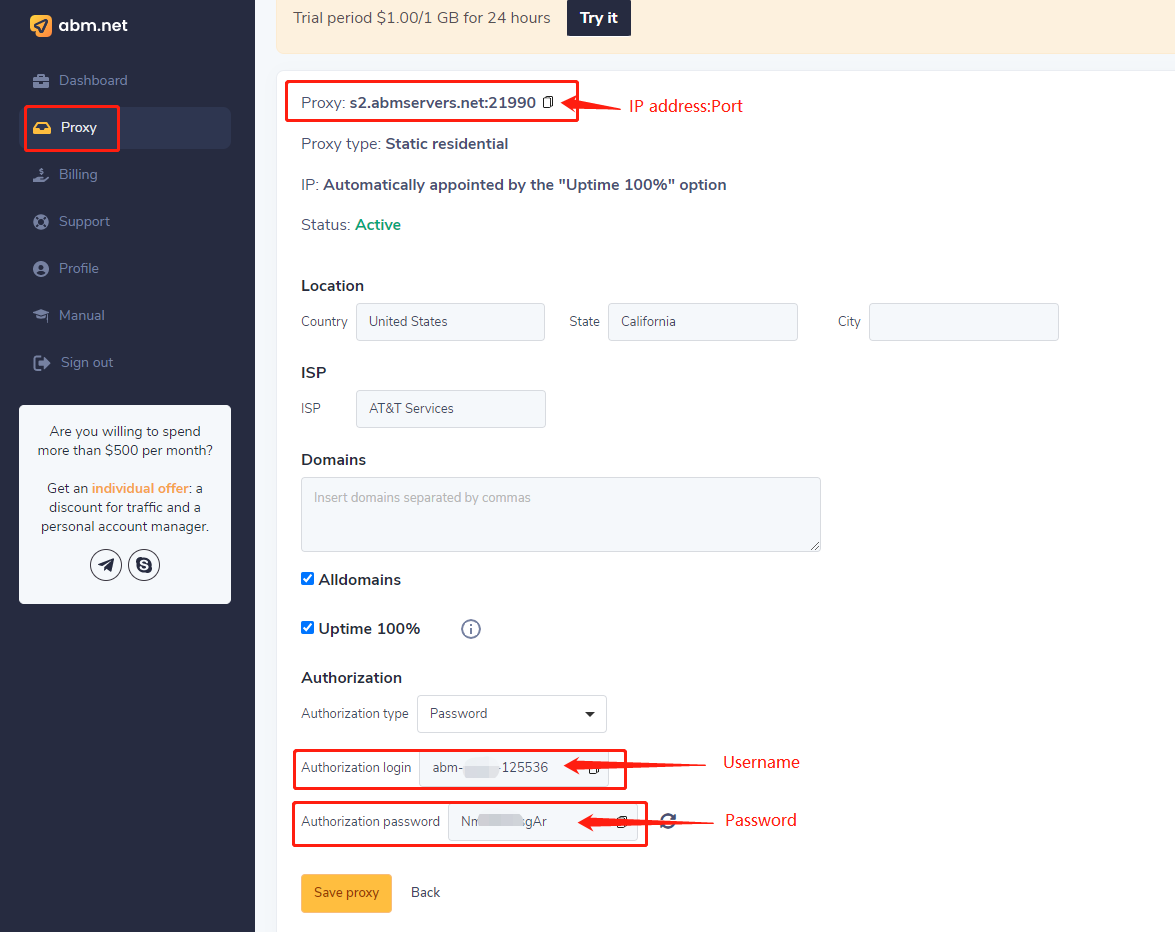
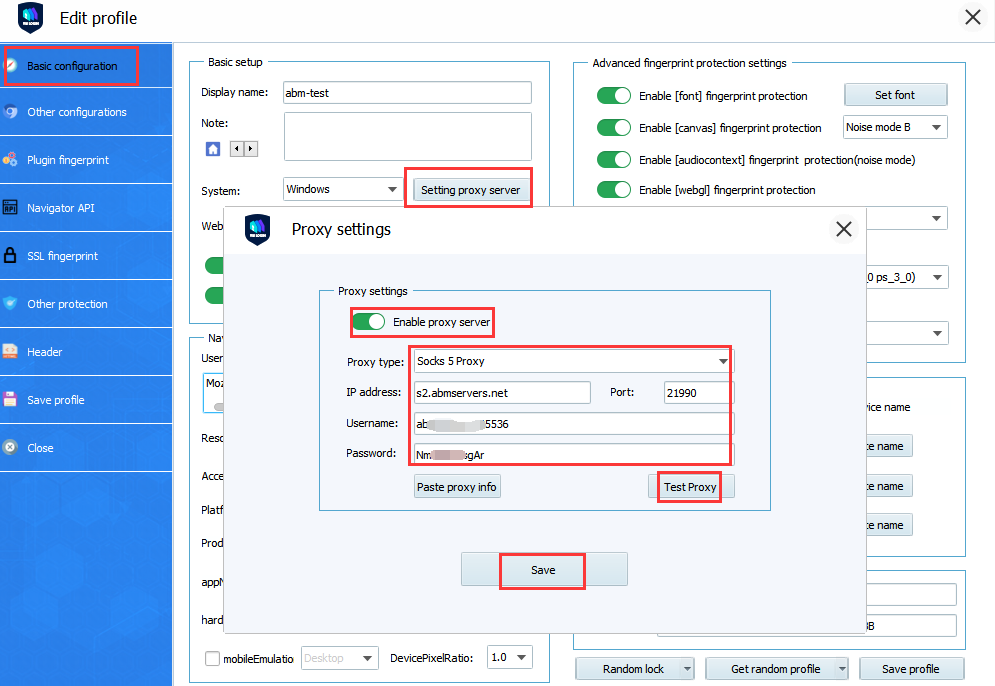
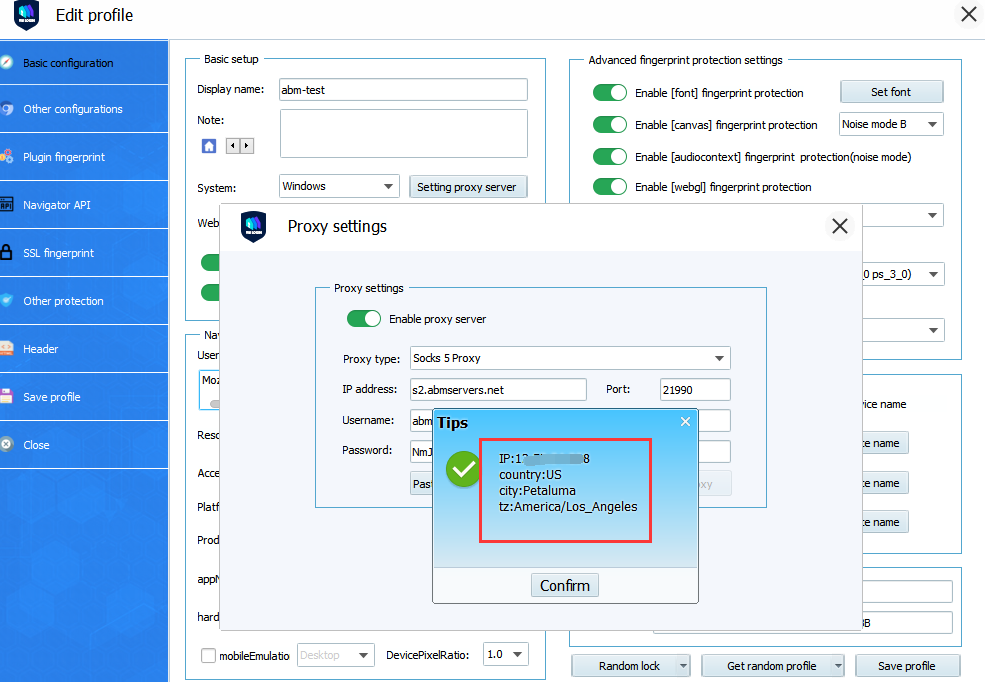
6.Open the VMLogin client version, click "Setting proxy server" in basic configuration bar, click ”enable proxy server” button, both HTTP and SOCKS5 are OK, enter the IP address, port, account password, click “Test proxy” to check whether it is connected, if it connects successfully, click “Save” button, then you can open the browser to use.